A grow-out spans anywhere from crown volume that carries you through the awkward stage to neck-length hair with real weight at the nape, and the version that works is the one that solves the specific problem your current length is giving you.
If the front sections are too short to style but long enough to fall forward, side-swept bangs turn that into a deliberate line; if the ends refuse to cooperate, feathered layers or choppy texturing removes bulk without losing length.
1. Grown Out Pixie with Crown Volume
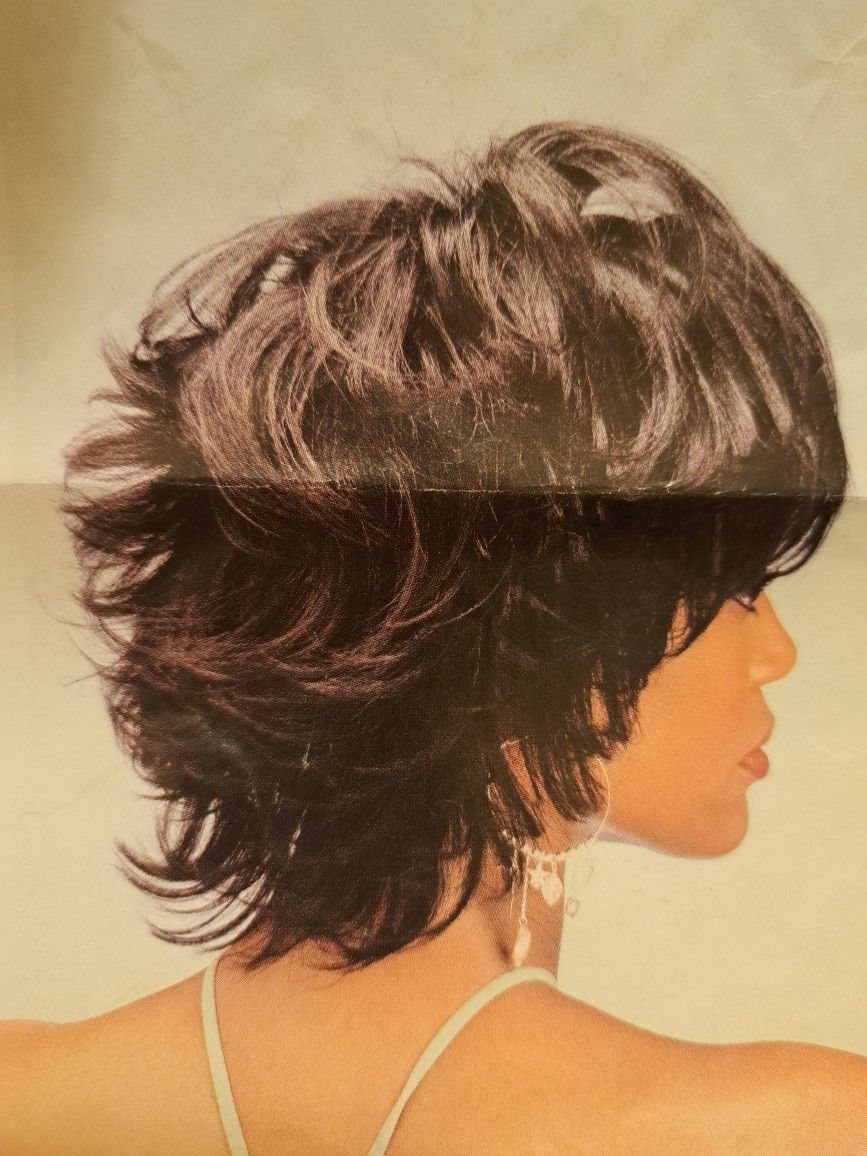
Crown volume is what carries a grow-out through the awkward phase where length is uneven but nothing is quite long enough to style normally.
Lift comes from the root.
Blow-dry the crown section upward with a round brush, or flip your head forward as you finish drying. A light volumizing mousse worked in before drying holds the shape without weighing it down.
The sides and back do the cooperating here; the crown does the work.
2. Curled Bangs
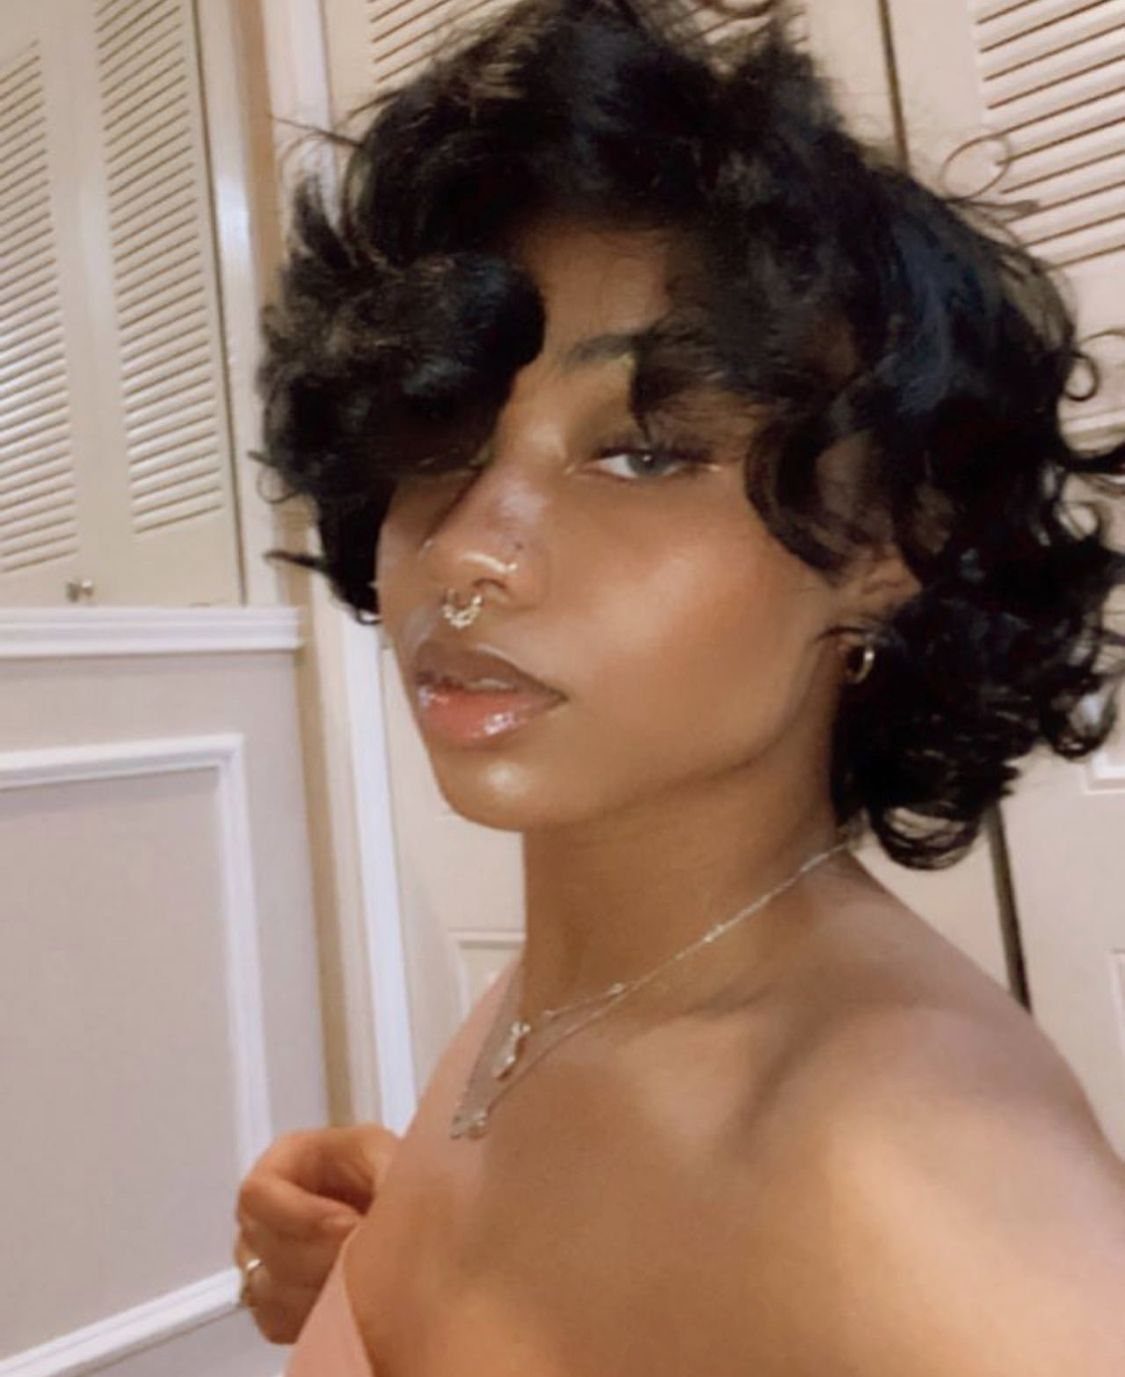
Curling the bangs forward gives a grow-out a finished shape even when the rest of the hair is still catching up.
Wrap the front sections around the barrel, release without pulling, and let them cool before touching. A glossing serum smoothed over the top afterward is what gives the whole look that polished finish.
Short hair responds fast to heat, so dial the temperature down.
3. Choppy Layers

Choppy layers are one of the better arguments for asking your stylist to cut into the ends rather than across them during a grow-out trim.
Point-cutting or razor-cutting the ends removes bulk without losing length, and it gives that lived-in, broken-up texture that makes a short cut look deliberate rather than unfinished.
The side-swept bang adds a second line of direction, so the eye reads shape instead of in-between.
A small amount of matte paste worked through dry hair separates the layers and keeps them from clumping flat.
4. Soft Layered Bob
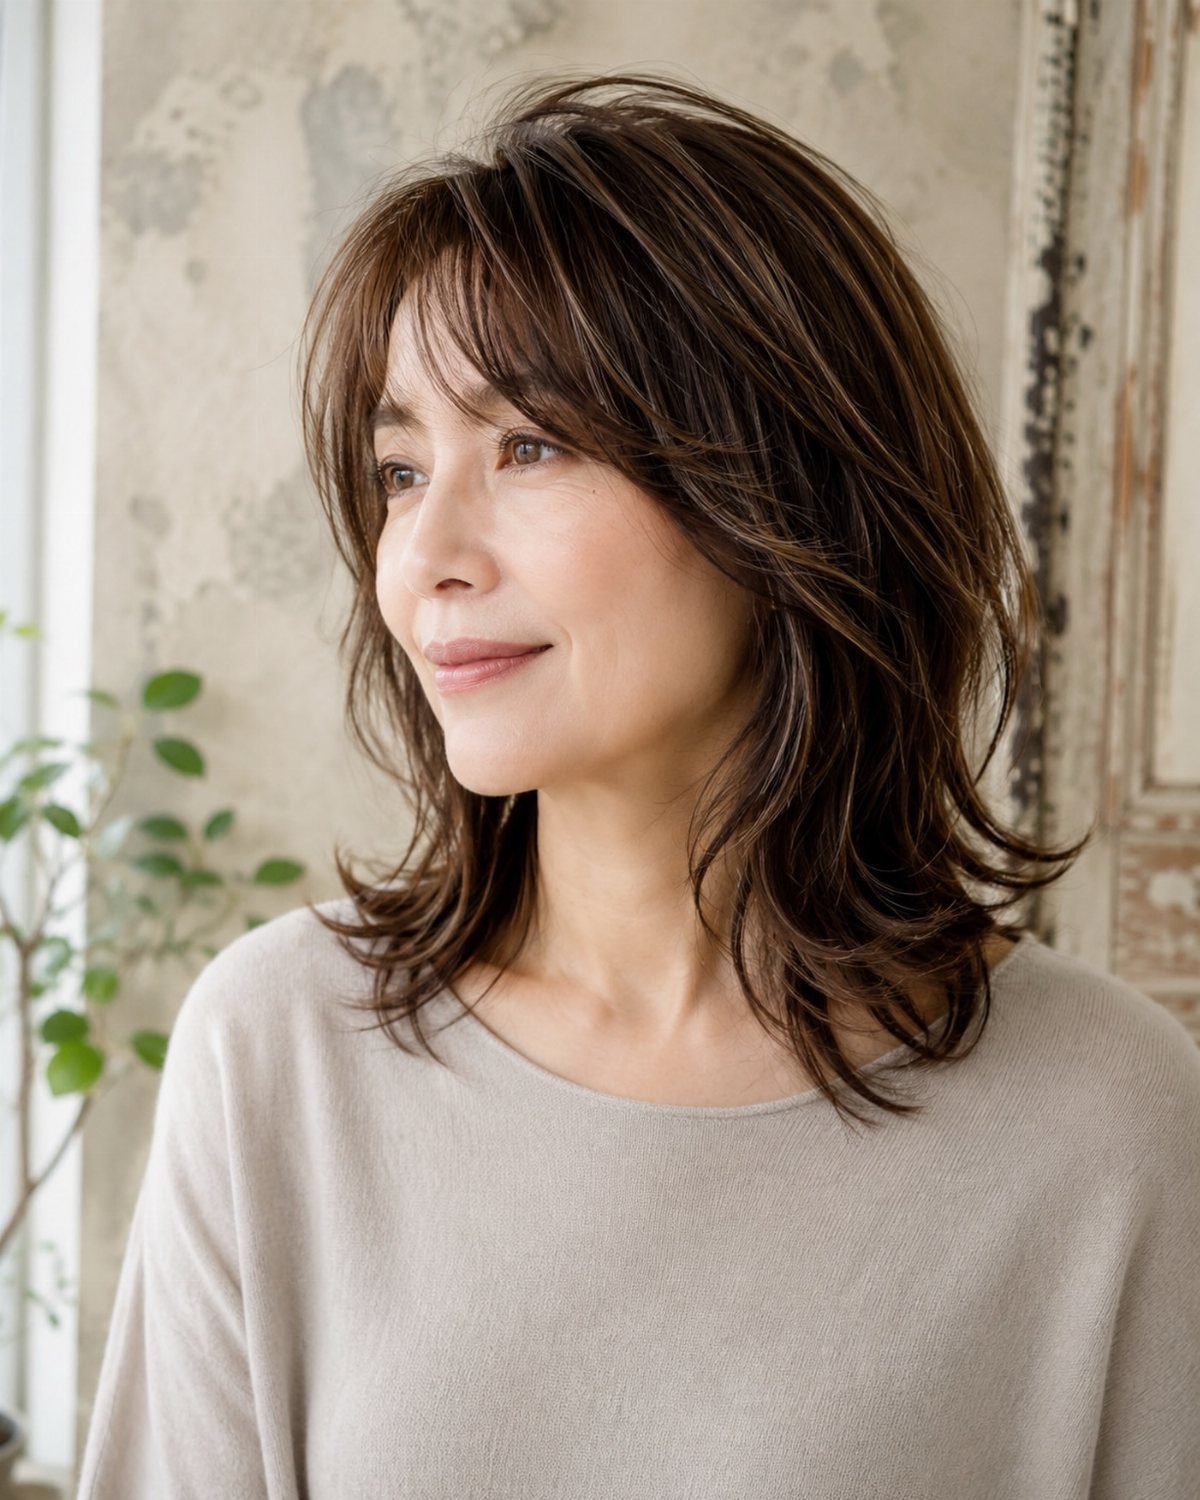
At the bob stage of a grow-out, the difference between looking polished and looking untidy is almost entirely about whether the ends have been shaped.
Wispy, tapered ends and a layered interior keep the silhouette soft rather than blunt. A round brush blowout builds the crown volume visible here; curl the ends under on the last rotation to coax them inward.
Bangs at this length can be trimmed at home with small shears if you cut into them at an angle rather than straight across.
5. Side-swept Bangs
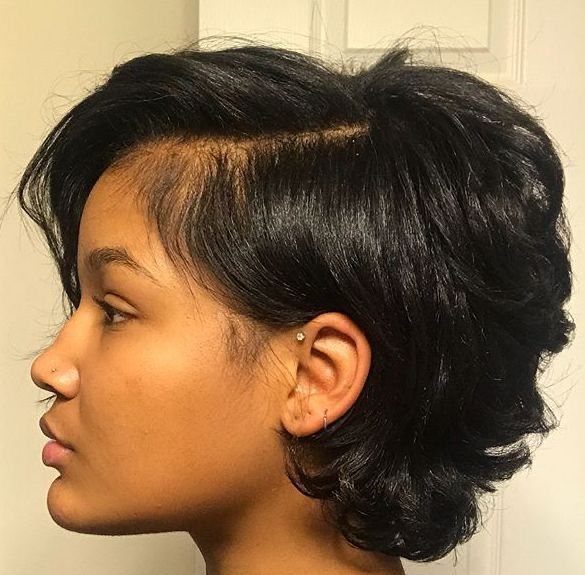
Side-swept bangs solve a specific grow-out problem: the front sections are usually the last to reach a workable length, and sweeping them to one side turns that into a style choice.
Blow-dry the bang section in the direction of the sweep while it is still damp, using a brush or even just your fingers, and it will hold that line all day.
The rest of the hair gains height from the layering, so the overall shape stays full rather than flat against the head.
6. Curly Pixie Grow-out

Natural curl is an asset in a grow-out, not a complication. At this length, the curl pattern itself creates the shape, which means less effort on days when the hair is doing its own thing.
Diffuse on low heat to encourage definition without frizz, and scrunch a curl cream through damp hair before diffusing.
The tighter the curl, the more shrinkage to account for: if length is the goal, the hair will read shorter than it measures until the curls loosen with weight as they grow.
7. Tapered Pixie with Volume
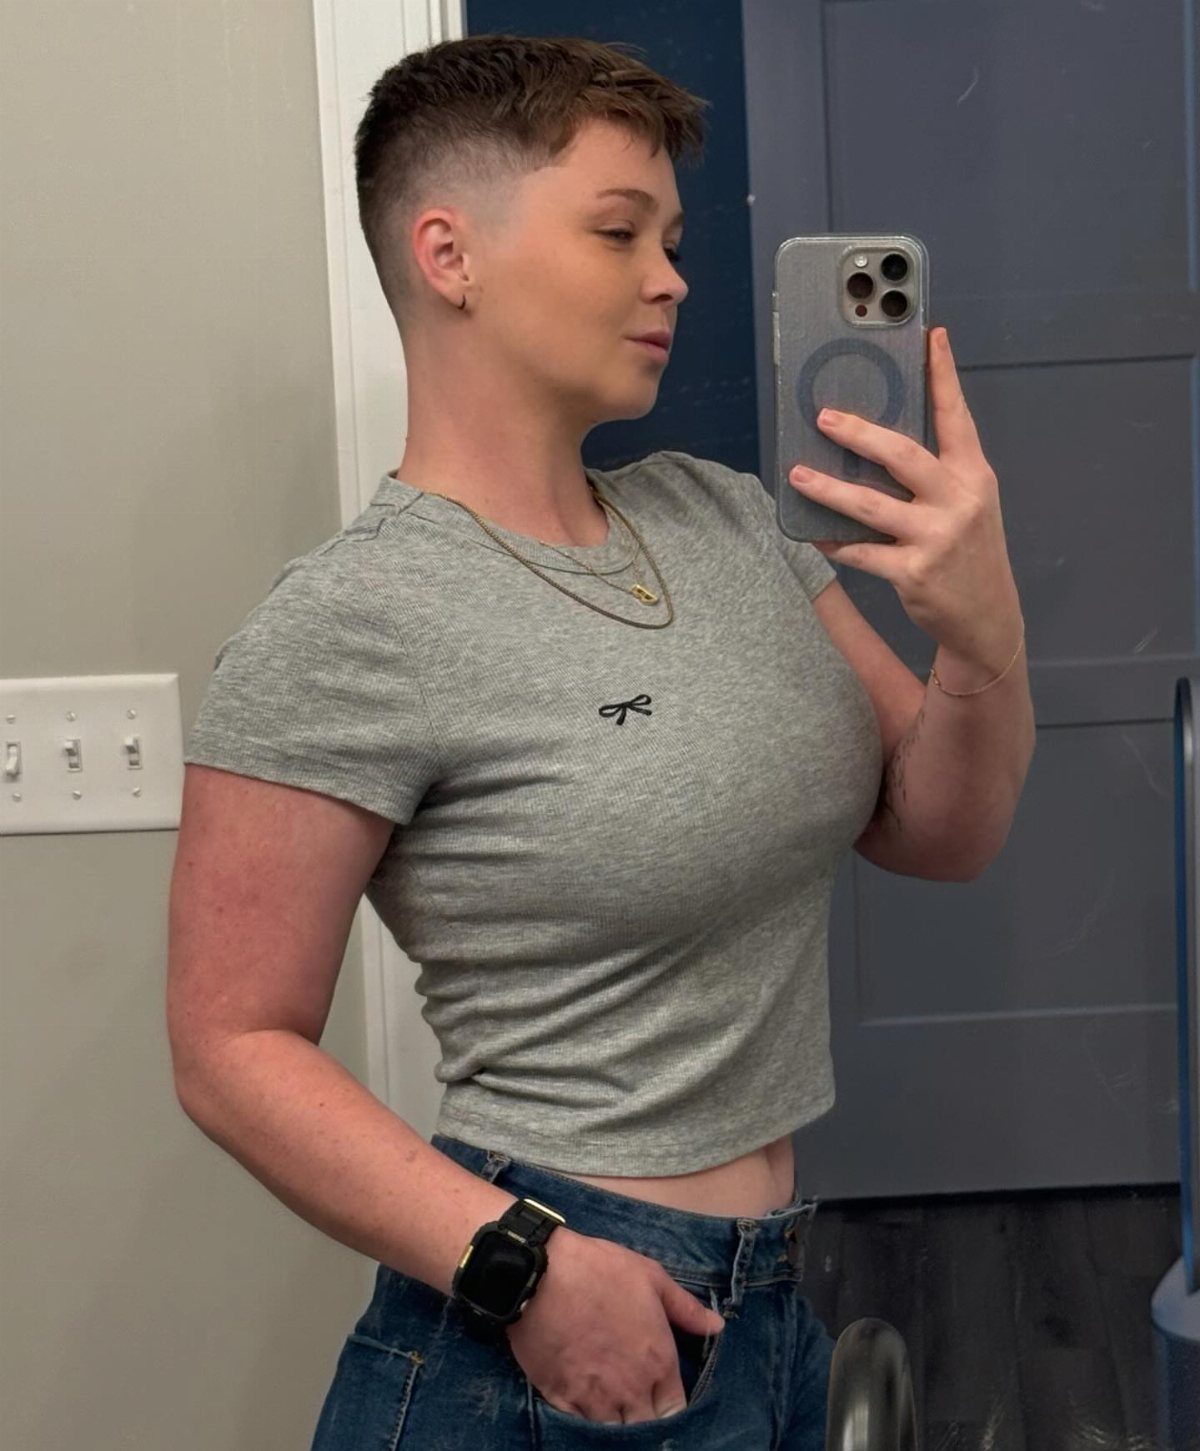
Tapering the sides and back while leaving the top long enough to lift is what keeps this cut from reading as simply short.
The volume comes from the contrast: close-cropped sides make any height at the crown read as deliberate. Blow-dry the top section upward, then finish with a light-hold pomade to keep it raised without crunch.
Ask for skin fade or scissor taper depending on how gradual you want the transition.
8. Grown Out Pixie with Ear-tucking
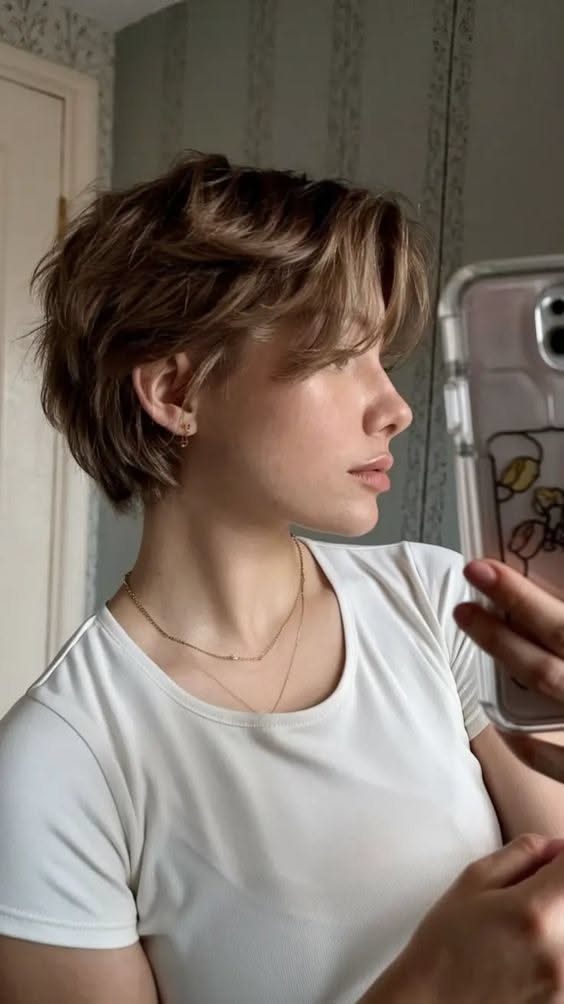
Tucking the hair behind one ear is one of those small moves that turns a mid-grow-out into something that looks chosen.
At this length, the sides are usually just long enough to stay put, and the fringe is long enough to sweep to one side and anchor over the ear.
A tiny amount of smoothing cream helps sections stay tucked if they keep slipping forward.
The look reads polished even when the cut itself is still catching up.
9. Soft Waves
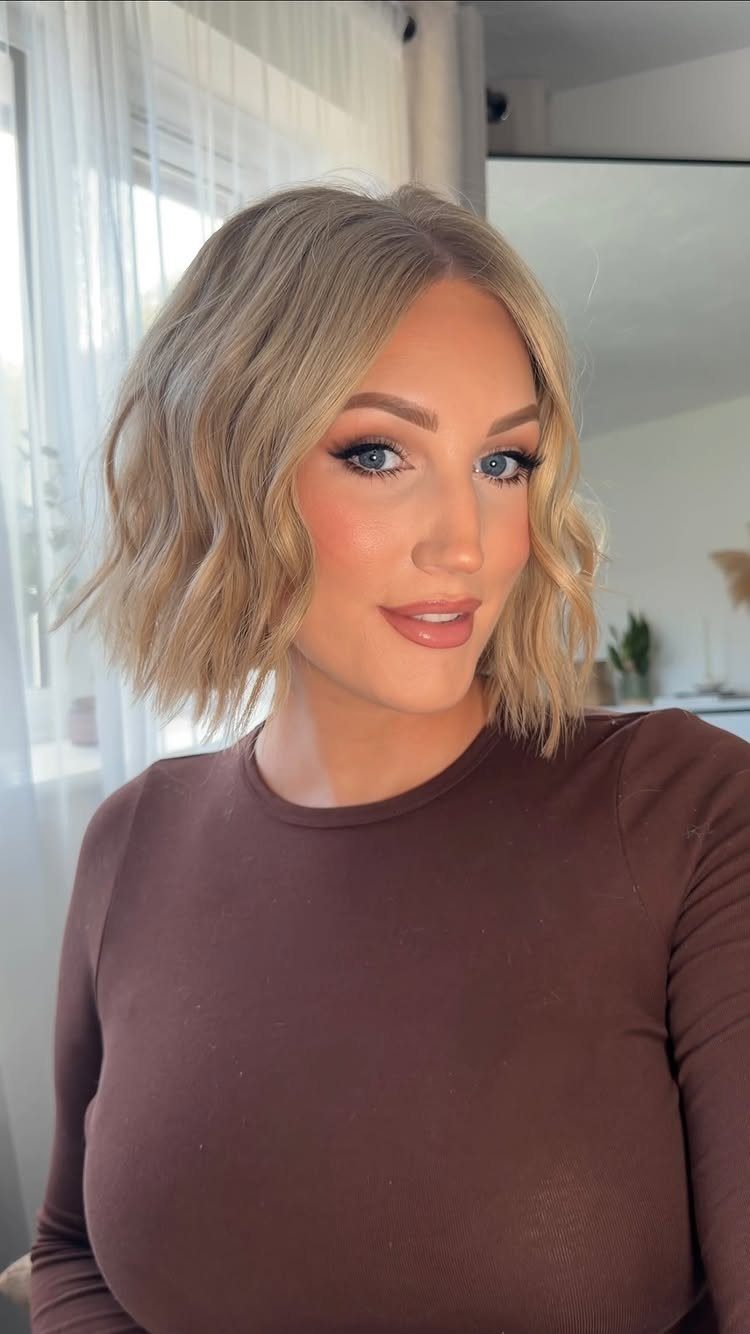
Soft waves at chin length are what this stage of a grow-out is built for: enough length to move, not so much that the wave falls out of it.
A 1-inch barrel, wrapping sections away from the face and releasing without pulling, gives the bend visible here.
Finger-comb rather than brush so the waves stay separated. The side part adds asymmetry that keeps the shape from going flat as the day goes on.
10. Feathered Layers
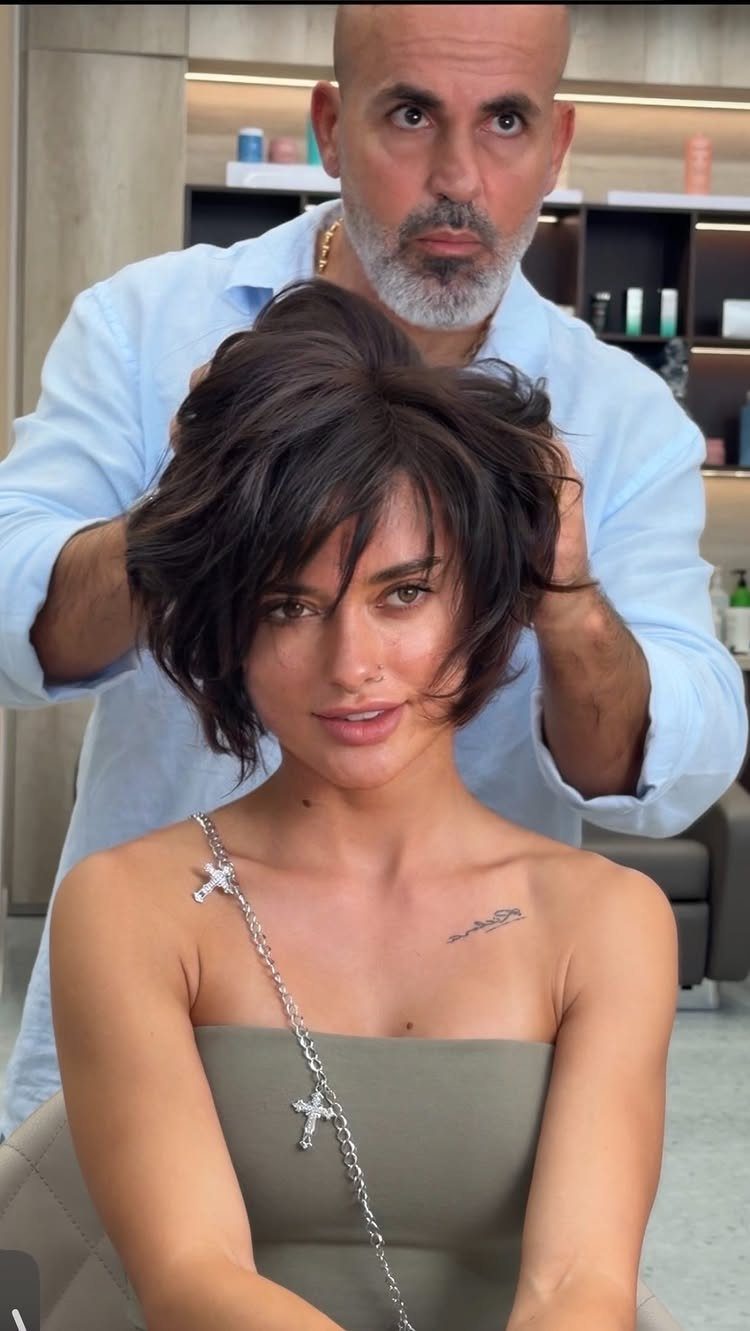
Feathered layers are a stylist’s tool for making a pixie grow-out look like a cut that was planned this way.
The technique involves point-cutting or razor-cutting the ends so they fall in fine, overlapping pieces rather than a single blunt line.
Movement through the lengths is what you actually get from the cut. Layers this light have almost no hold on their own, so a small amount of lightweight oil or glossing serum keeps them from lifting into frizz.
11. Textured Ends
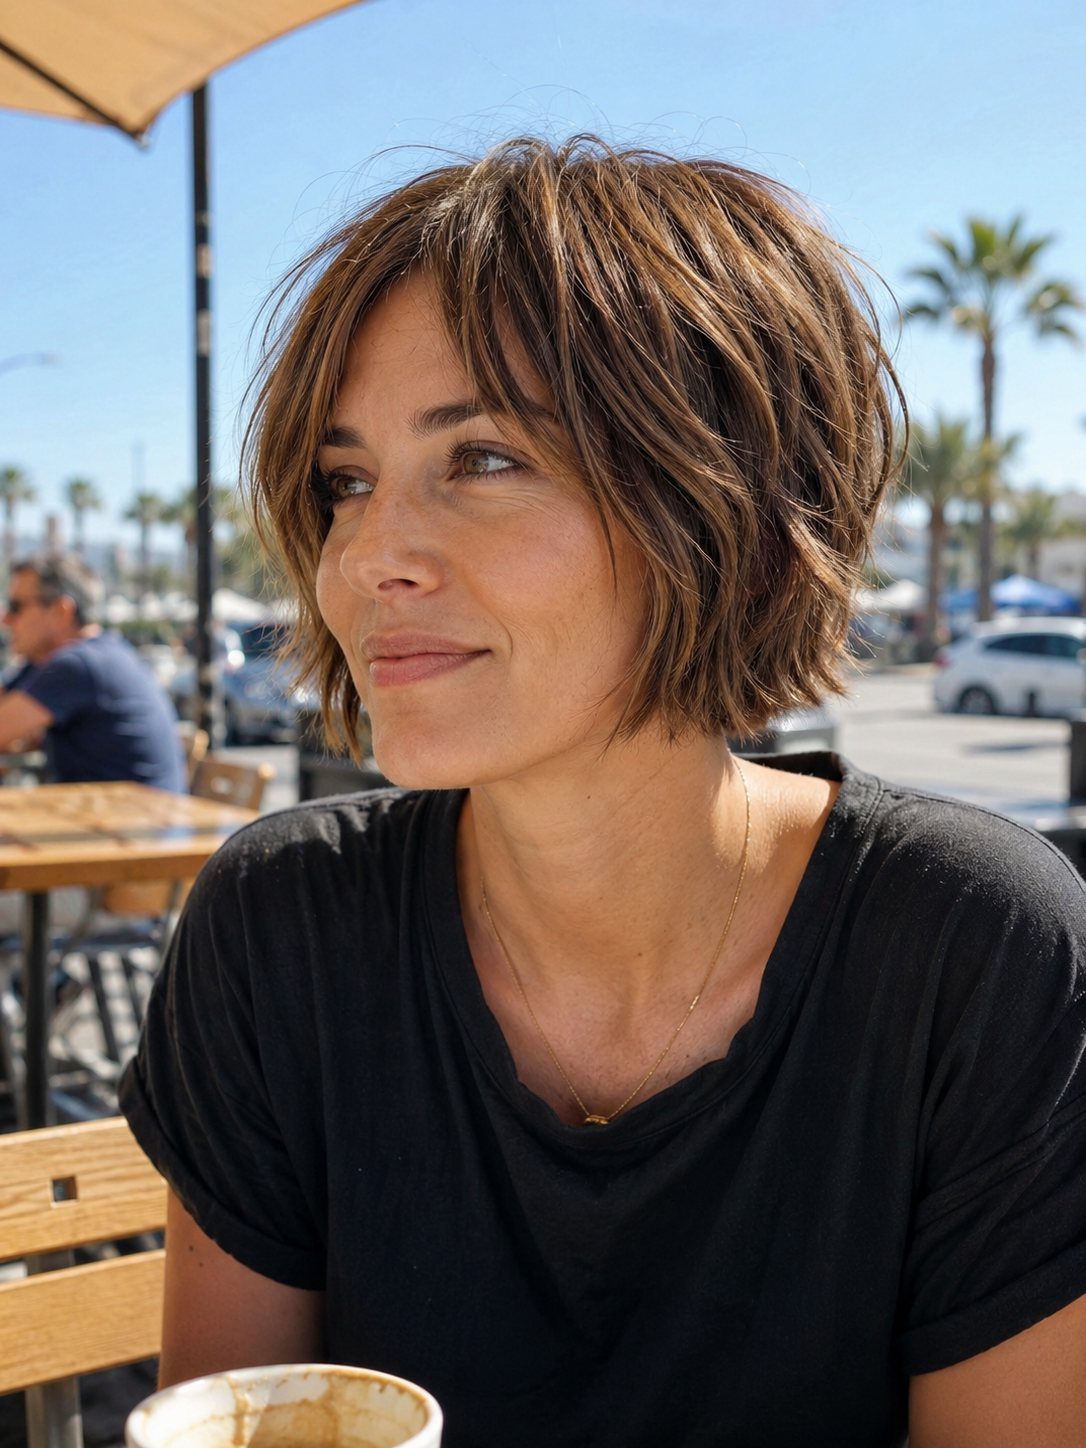
Textured ends at this length do a specific job: they soften the perimeter so the outline reads as relaxed rather than grown-out.
Point-cut ends are what produce the separation visible here, where individual pieces fall at slightly different lengths instead of landing as one solid line.
Side-swept bangs add a front line of direction, which matters at this stage because the face-framing sections are often the least cooperative.
12. Neck-length Pixie
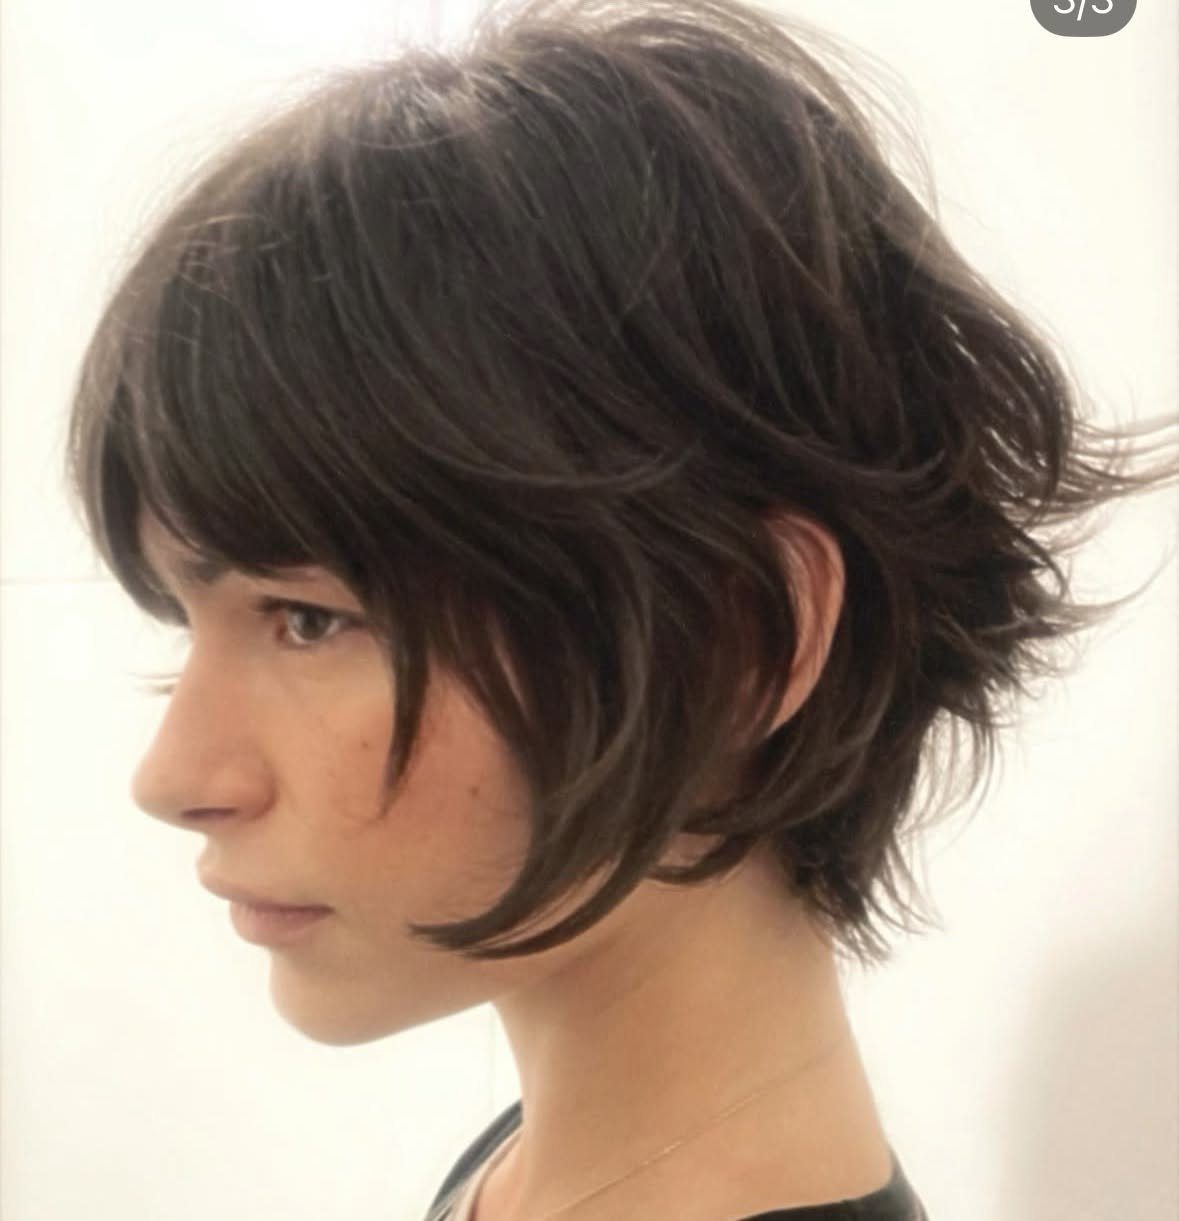
Mid-neck length sits at an interesting point in a grow-out: short enough to read as a pixie, long enough that the nape hair has real weight and direction.
That nape length needs a plan. Left to dry on its own it tends to flip or curl unevenly, so blow-dry it downward and smooth it flat against the neck while it is still damp.
The textured top does most of the styling work; a small amount of paste through the upper sections is enough to define the layers without adding bulk.
Frequently Asked Questions
What are the stages of growing out a pixie cut?
The stages move from short pixie with tapered sides through ear-length with tucking options, then to chin length where waves and soft layers become workable, and finally to a bob where shaped ends replace the in-between look.
At each stage, the crown carries the silhouette while the sides and back catch up in length. Styling shifts from volumizing the top at the shortest phase to shaping the perimeter once enough length arrives.
What face shape is good for a pixie?
A pixie with volume at the crown and tapered sides suits most face shapes because the height balances proportions and the short perimeter keeps the focus on bone structure.
Side-swept bangs and asymmetric parts add softness for rounder faces, while feathered or choppy layers prevent the cut from reading too severe on angular faces.
The versatility comes from adjusting where volume and texture sit rather than the base cut itself.